
My Cricket Square Renovations Guide is my how l do renovations, but also l cover the back to basics steps. Whatever level we are working to, we are just trying to achieve the three R’s
Assessment/Planning
Renovation planning for me starts in my mind around July, l take some cores to assess depth of any thatch that help me access the aggression of upcoming renovations. Once l have a plan of the type of renovations need to carry out l can then decide how much loam and seed l am going to require and send out emails to supplier to get some quotes.
Once l had all the quotes in, prices have gone up again this year but some shopping around. I work out when l wanted the supplies to be delivered (early September) and then went ahead and order the supplies. I have to book in a haulage contact to get the scarifer over from our main ground and sort the loan/hire of a topdresser. We are fortunate enough to have our own tractor and seeder attachment.
Reduce Height of Cut and Water
We start off cut gently lowering down the height of cut a week prior and thinned out some pitches that where very thickly grassed. Our final height of cut pre renovations is around 5mm and we verticut i.e., thin out any unused pitches across the three squares where the grass cover was dense.
Scarification
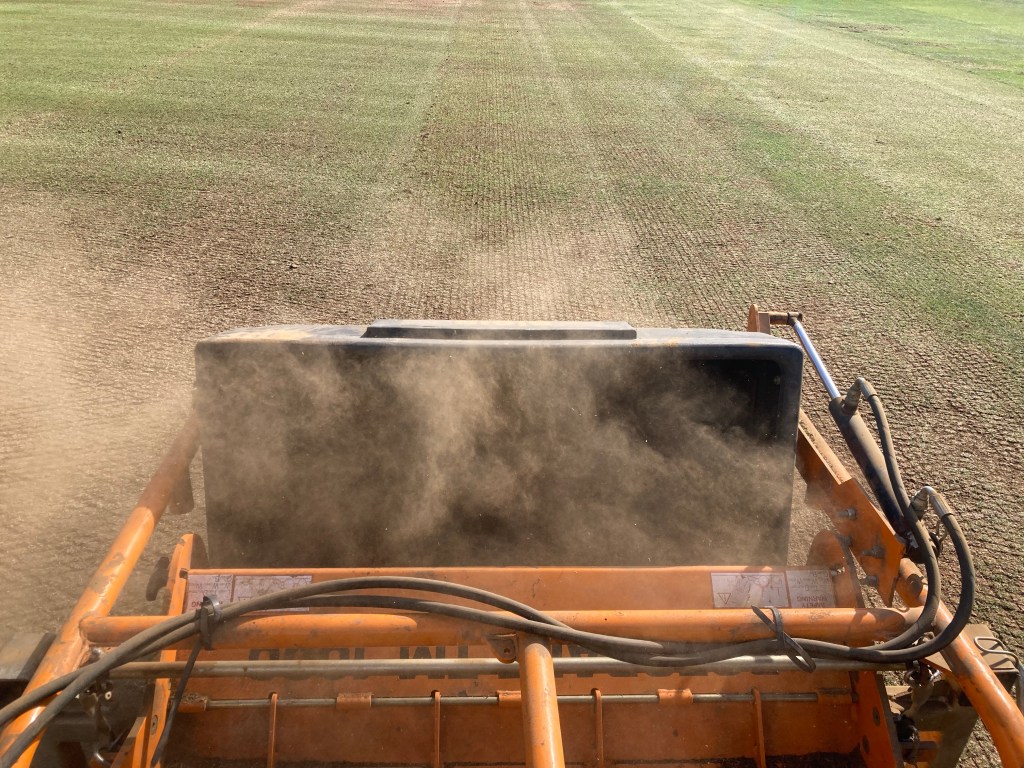
Scarification is usually carried out over a two-day period, just working a few millimetres into and across the squares, to thin out the grass canopy and shallow rooted weed grass (poa). The aim is to reduce the grass canopy down to single grass plants as much as possible, without removing large amounts of valuable loam.
The beauty of using a tractor mounted scarifer, is much easier on the body and so productive you can hit the square more times. I lightly scarifed as above probably up to eight/nine time and then finished with a deeper into line pass at 7-10 mm, this pass will be hitting a lot of loam and creates a good key for seed and loam to sit in going forward. We clean up any droppings from the scarifer box, with rotary mowers set low as and when required.
Seeding
One good thing about the rain we didn’t have to pre water the squares prior to dimple/star seeding which created thousand of holes 10-15 mm deep which the seed could sit in securely. If no rain then we will usually pre water the square at the end of the day and seed the following morning.
Before we seeded, we cut down to 5mm, dimpled a couple of directions, then added a third of our seed and brushed in. We repeated this twice more, so a total of six directions and three applications of seed over the square followed by brushing in. In general we usually use around 65 kg of seed, which equals 80 grams a squares metre.
Levelling of Ends
Prior to general topdressing of the square, we take some time go around and push some extra seed and loam into any low ends. We use a lute to do this and a wheel barrow full of loam and work our way along the ends.
Aeration
At this point, we got on our vertical punch type aerator and aerate to 1 inch depth, spiking any deeper than this will bury the crown of the new seed and plant. If required we will water the area first, then wait to ensure we can get the spiker to penetrate.
Topdressing
We are fortunate to be able to loan a top dresser, which fits on the back of our tractor. If we want to apply 8 bags a pitch, we just fill the hopper with 8 bags and then do one pitch at time and work our way across the square. Most occasions we apply 8-10 bags a pitch, but this number does allow for the levelling of ends. This year we applied 8 bags a pitch across the site.
Levelling/Working in of Topdressing
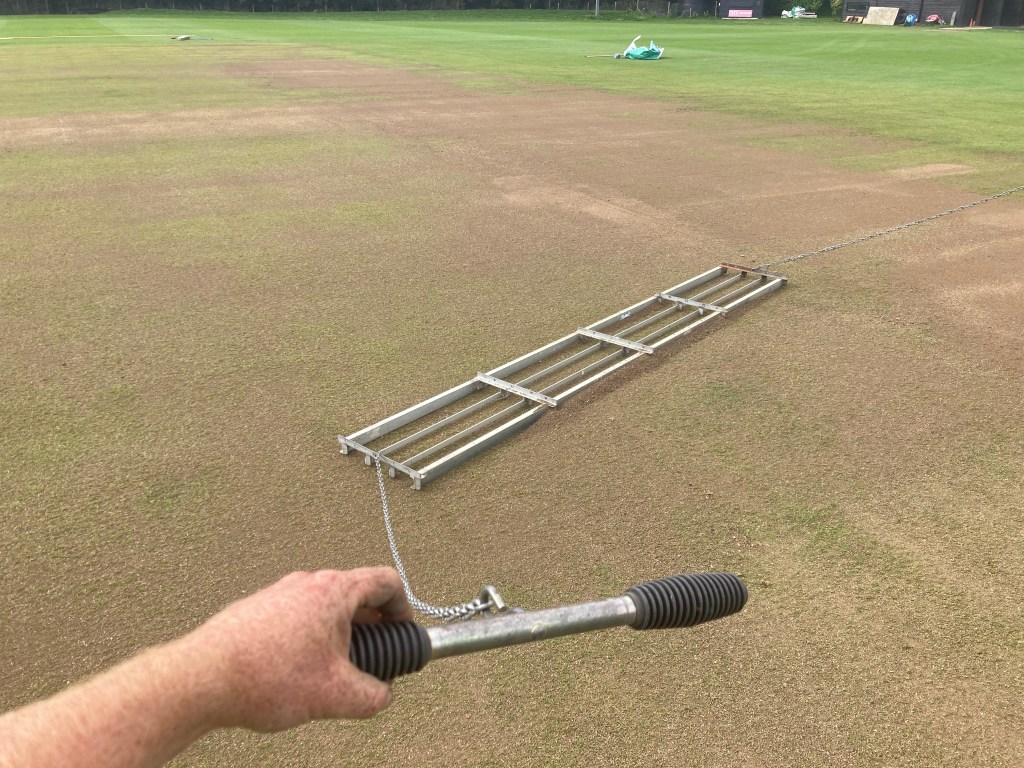
Depends on how even the topdressing is applied and what we are trying to achieve, but if its our small square where are levels are poorer, we tend to work the dressing in using a straight edge frame or ladder. We did this on our small square.
The straight edge frame (above image), will pull loam off any high areas and deposit them into any low area so is ideal for squares not quite level.
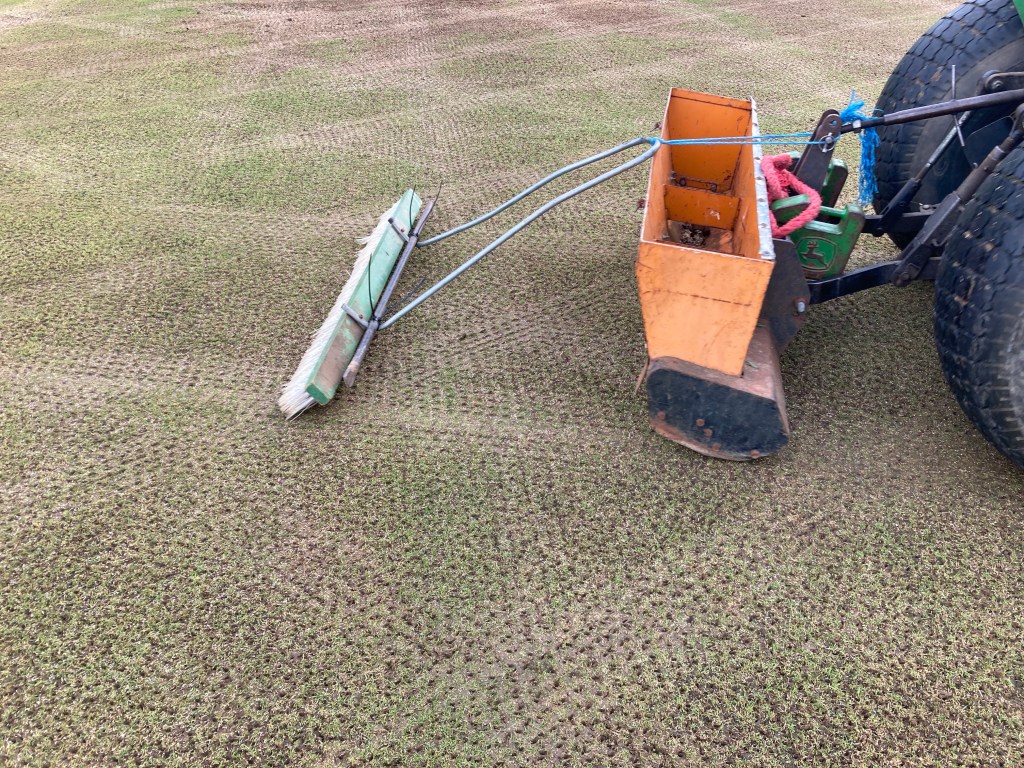
On our main square where levels are perfect, we use the pull behind brush and if on site a drag matt, this will just even out the topdressing and gently work in into the dimple seeding and scarification lines. We did this on our main square.
Pre-Seeder
We have stopped applying a pre seeder, as we believe it pushes up the old & existing grasses to compete with the new seed, instead we will use this pre seed fertiliser after the first few cuts of the new sward.
Final Levels
If weather and time allow l will often go around and just re check the ends are level using a 3-metre straight edge, and adding loam to any low areas under it. I will try and not interfere too much with the middles of the square but do like to finish off knowing by ends are as level as they can be.
Fence off
We like to fence off our squares, with temporary fencing such as chicken wire this helps keep leaves, rabbits and footballers off the squares.
Aims of Renovations
This level is not possible for many at the grassroots who simply just have a day to complete their renovations, when volunteers are on hand to help out. Whatever way you do yours and it works for you that’s great, below are just a few steps bullet pointed and how you do them is up to you and what is possible.
The Three R’s
Remove – Dead/Weed Grass/thatch and thin out the grass canopy to allow for fresh seed and loam. Create a key for the loam and seed via scarifying lines and maybe dimple/sarol holes 10-15mm deep.
Reseed– Applying 50-75 grams a square metre, 100% rye grass seed suitable for a cricket square. Possibly up to 100 grams a square metre if square been kored planed off.
Restore– The restoring of levels by means of topdressing, how much required is dependent on how aggressive scarification, levels but as a general guide 6-8 bags a pitch, not including the levelling of ends.
Remove-Reseed-Restore is all any of us are trying to achieve and l hope your renovations go well/went well.
How do you do yours, any differences, tricks or tips if so just leave a comment in the reply box below.
Brian on behalf of the TurfCareBlog Community
Want to know what to do this Autumn/Winter on the square, why not take a look at my Annual Maintenance Guide eBook –https://turfcareblog.com/annual-guide-to-the-maintenance-of-cricket-squares/
For another interesting read on criket renovations, take a look at this interesting blog from the team at TurfPro.com- https://turfpro.co.uk/component/zoo/editor-s-blog-planning-cricket-renovations?Itemid=101https://turfcareblog.com/annual-guide-to-the-maintenance-of-cricket-squares/

Click above image to view eBook